

Oversized art placement best practices are defined by three non-negotiable principles: correct eye-level height, proportional sizing relative to furniture, and secure mounting hardware matched to the piece’s weight. Get any one of these wrong, and a statement piece becomes a visual liability. The 57–60 inch rule sets the vertical center of any artwork at 57 to 60 inches from the floor, the standard used by professional installers in residential spaces. Pair that with the guideline that art should span 60–75% of furniture width below it, and you have a foundation that works in nearly every room. Agostudio curates large-format original works specifically sized and composed to meet these standards, so the art does the heavy lifting once you nail the placement.
1. Oversized art placement best practices start with eye-level height
The vertical center of your artwork belongs at 57 to 60 inches from the floor. This range reflects the average standing eye level for adults and is the standard professional galleries and residential installers use. Placing art higher than 60 inches forces viewers to crane their necks. Placing it lower creates an awkward disconnect between the piece and the room.
One important exception applies to rooms where people primarily sit. The visual center for seated viewers differs meaningfully from standing eye level. In a reading nook, home theater, or low-seating lounge, drop the center height by 4 to 6 inches to match the sightline of someone in a chair.
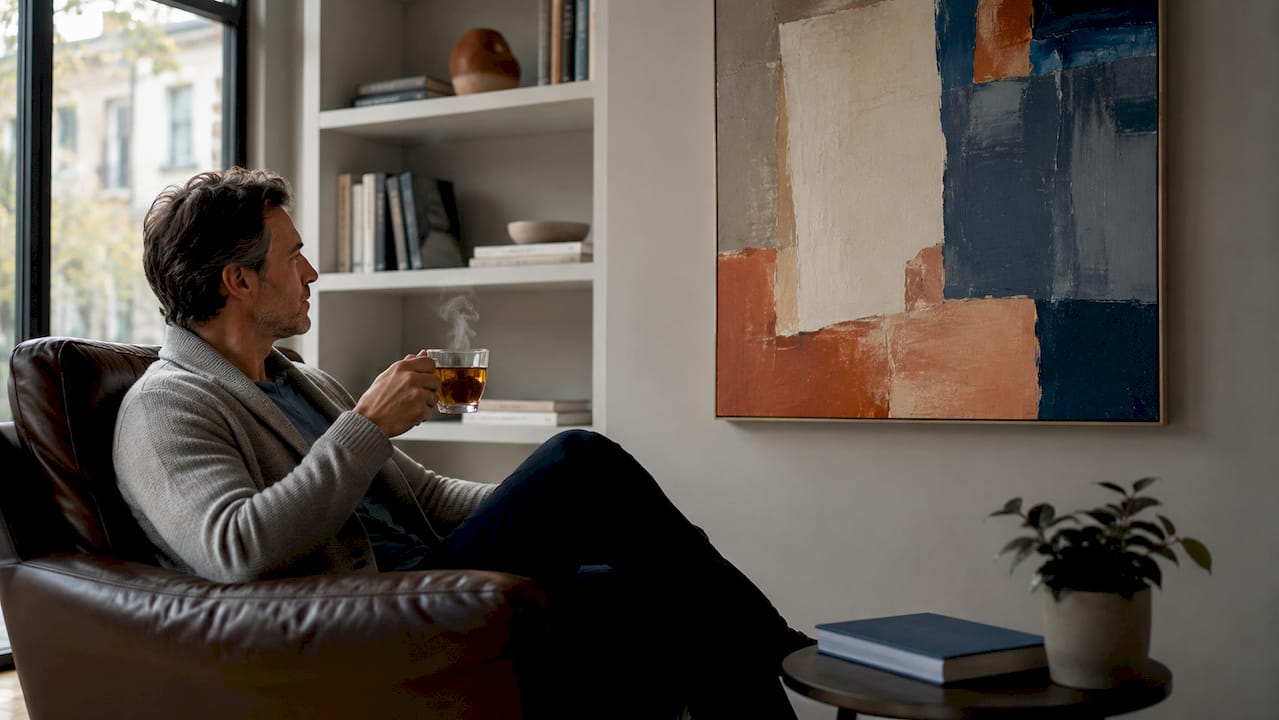
Pro Tip: Tape a piece of paper at 57 inches on the wall and step back. If it feels too low for your specific ceiling height or furniture arrangement, adjust up by 2 to 3 inches before committing to any holes.
2. Sizing art proportionally to furniture and wall space
Art that is too small above a sofa looks like a postage stamp. Art that is too wide overwhelms the furniture beneath it. The 60–75% rule solves this: your artwork’s width should cover 60 to 75 percent of the furniture width directly below it. A 90-inch sofa calls for art that is 54 to 67 inches wide.
Hang the bottom edge of the art 6 to 10 inches above the furniture below it. This spacing visually connects the art and the furniture as a single composition. Going higher than 10 inches breaks that connection and makes the art float.
Ceiling height also matters. In rooms with ceilings above 10 feet, you have room to scale up. In standard 8-foot rooms, a piece taller than 48 inches can feel oppressive if it crowds the ceiling. Leave at least 12 inches of breathing room between the top of the frame and the ceiling line.
3. Mapping your wall before drilling a single hole
Masking tape on the wall is the single most underused tool in art placement. Cut tape to the exact dimensions of your piece and stick it to the wall. Live with it for a day. Walk past it at different times, in different light, and from different angles. Homeowners consistently misjudge scale until they see a physical outline on the wall.
This technique also reveals problems before they become permanent. You might discover the piece crowds a doorframe, competes with a window, or sits awkwardly above an outlet. Tape costs nothing and saves you from patching unnecessary holes.
Pro Tip: Use a level when applying the tape outline. A slightly crooked tape rectangle will look fine until you hang the actual piece and realize the error.
4. Mounting hardware matched to weight and wall type
The mounting method is where most large-format art installations fail. Single-wire hanging on a single hook is not adequate for pieces over 20 pounds. French cleats and dual hooks are the correct choice for heavy pieces because they distribute weight evenly across the wall and prevent the artwork from tilting or shifting over time.
For pieces over 22 pounds, stud mounting is the preferred method. Use a stud finder to locate solid framing behind the drywall before driving any hardware. Drywall anchors alone cannot reliably hold large canvases long-term, especially in humid climates where walls expand and contract.
| Artwork Weight | Recommended Hardware | Wall Anchor Type |
|---|---|---|
| Under 10 lbs | Single hook or adhesive strip | Drywall anchor |
| 10–20 lbs | Two-hook system or D-rings | Drywall anchor or stud |
| Over 20 lbs | French cleat or dual hooks | Wall stud required |
| Over 50 lbs | French cleat with stud mounting | Multiple studs |
Pro Tip: Always use two anchor points for any piece wider than 24 inches, regardless of weight. Two points prevent rotation and keep the piece level over time.
5. Using spatial planning and visual hierarchy
Professional installers treat placement as building a visual hierarchy, not following a fixed checklist. The art’s relationship to the room’s circulation, furniture mass, and natural sightlines determines whether it reads as a focal point or just a large object on a wall.
Anchor your art composition to the furniture below it, not to the wall itself. A piece centered on a blank wall with no furniture reference floats without context. Centered above a console table, sofa, or bed, it becomes part of a grounded composition.
Key spatial principles to apply:
- Allow generous negative space around the piece. Crowding it with shelves, sconces, or other art dilutes its impact.
- Place art where the primary viewing angle is direct, not oblique. A piece on a side wall that you only see at 45 degrees loses its presence.
- Avoid narrow walkways and areas behind doors, where the art gets obstructed and risks physical damage.
- For gallery walls with multiple pieces, start with the largest piece and build outward, keeping consistent spacing throughout.
The largest piece anchors the composition and sets the visual weight. Smaller supporting pieces should not compete with it in color intensity or scale.
6. Lighting that makes oversized art come alive
Lighting is the most overlooked variable in large artwork display. The wrong light source flattens color, creates glare, and makes even a stunning piece look dull. Warm LED directional lighting or dedicated picture lights bring out color depth and surface texture in ways that overhead ambient lighting cannot.
Position directional lights at a 30-degree angle from the wall surface. This angle catches texture without creating harsh shadows. Lights mounted too close to the wall wash out the piece. Lights angled too steeply create hot spots.
Practical lighting rules for large art:
- Use warm white LEDs (2700K–3000K color temperature) for oil paintings, textured canvases, and warm-toned prints.
- Avoid placing art directly opposite large windows where afternoon sun creates glare across the surface.
- Direct sunlight causes UV fading and material degradation over time. Use UV-filtering glass or position art away from direct sun exposure.
- Dimmer-controlled picture lights let you adjust intensity for daytime versus evening viewing.
Pro Tip: Before installing permanent lighting, test with a portable LED spotlight held at different angles. The difference between 20 degrees and 40 degrees of angle is dramatic and worth testing before you commit.
7. Common mistakes that undermine large artwork display
The most common error is hanging art too high. Homeowners instinctively push art upward, especially in rooms with high ceilings, but this disconnects the piece from the furniture and the viewer. The 57–60 inch center rule exists precisely because it keeps art in the human visual field, not the architectural one.
Matching art too closely to existing decor is a subtler mistake. A piece that perfectly mirrors the sofa color or repeats the rug pattern disappears into the room. Art should complement the space, not camouflage itself within it. Contrast in color, texture, or subject matter creates the visual tension that makes a piece memorable.
“The biggest mistake I see is treating placement as the last step. Placement is a design decision that should happen before the art is purchased, not after it arrives. Know your wall, know your sightlines, and know your weight limits before you fall in love with a piece.”
Other frequent errors include:
- Using a single nail for pieces over 15 pounds, which risks wall damage and dropped art.
- Ignoring wall structure and mounting into drywall alone for heavy pieces.
- Overcrowding a wall with multiple large pieces that compete rather than complement each other.
- Skipping the tape-mapping step and guessing at scale.
For a deeper look at large wall art arrangements by room type, the room-by-room approach helps you match scale and subject matter to function.
Key takeaways
Oversized art placement succeeds when height, proportion, mounting hardware, and lighting work together as a system, not as separate decisions made at different times.
| Point | Details |
|---|---|
| Use the 57–60 inch rule | Center your artwork at 57–60 inches from the floor for comfortable eye-level viewing. |
| Match art width to furniture | Art should span 60–75% of the furniture width below it for visual balance. |
| Use French cleats for heavy pieces | Pieces over 20 lbs need French cleats or dual hooks mounted into wall studs. |
| Map with tape before drilling | Tape the artwork dimensions on the wall and live with it for a day before committing. |
| Light at 30 degrees with warm LEDs | Directional warm LEDs at a 30-degree angle reveal texture and color without glare. |
What I’ve learned from getting placement wrong first
I used to think placement was the easy part. You hang the art, you step back, and if it looks good, you’re done. That approach cost me three sets of unnecessary wall patches and one genuinely embarrassing moment when a large canvas tilted off a single hook at a dinner party.
The shift that changed everything was treating placement as a design decision made before the art arrives, not after. Now I measure the wall, map the furniture, and identify the stud locations before I even order a piece. That sequence sounds obvious in retrospect, but most homeowners do it in reverse.
The 57–60 inch rule is a genuine baseline, not a rigid law. Rooms with very low ceilings, unconventional furniture heights, or primarily seated use all call for adjustments. The rule gives you a starting point. Your specific room gives you the final answer.
One thing I tell anyone dealing with a piece over 30 pounds: hire a professional installer for the mounting. The art itself is the investment. The installation cost is insurance on that investment. French cleats installed correctly into studs will hold for decades. A single hook driven into drywall is a question of when, not if.
The most underrated advice I can give is to experiment before committing. Tape, natural light at different times of day, and a few hours of observation will tell you more than any measurement guide. Trust what you see.
— DAVID
Agostudio’s collection for statement walls
Large-format art deserves a source that takes scale seriously. Agostudio curates original works from real artists, selected specifically because they carry emotional weight and visual presence at large sizes.
Each piece in the art prints collection is chosen to function as a focal point, not background decoration. If you want ongoing access to curated large-format works, the Artist Print Club delivers new selections regularly, so your walls stay current without the guesswork of sourcing independently. Agostudio’s team selects pieces that resonate at the scale and emotional register that transforms a room rather than just filling it.
FAQ
What is the correct height to hang oversized art?
The vertical center of oversized art should sit 57 to 60 inches from the floor. In rooms where viewers are primarily seated, lower the center by 4 to 6 inches to match seated eye level.
How wide should oversized art be relative to my sofa?
Art should span 60 to 75 percent of the sofa or furniture width below it. For a 90-inch sofa, that means art between 54 and 67 inches wide.
What hardware do I need for heavy oversized art?
Pieces over 20 pounds require French cleats or a dual-hook system mounted into wall studs. Single-wire hanging is not adequate for large or heavy artwork.
How far above furniture should I hang oversized art?
Hang the bottom edge of the art 6 to 10 inches above the furniture below it. This spacing creates a visual connection between the art and the furniture as a unified composition.
How do I avoid glare on oversized art?
Use warm LED directional lights positioned at a 30-degree angle from the wall surface. Keep art away from direct sunlight and large windows that generate afternoon glare across the piece.